Search Results
40 results found with an empty search
- What is Connected Construction?
Imagine the typical construction company 10 years from now. What will day-to-day operations look like for its engineering and constructing civil and building projects? If you pictured a high-tech scenario where interconnected teams and technologies work together in highly collaborative, real-time working environments to increase productivity and efficiency, you might not be far off. A new technology mindset for a new era Connected construction is driven by data and collaboration At its core, connected construction relies on data to inform decisions and uncover insights that boost productivity, quality, safety, and sustainability. It goes beyond simply linking machines or systems. Rather than a basic, one-off connection between tools or devices, connected construction represents a broader digital transformation. It’s about establishing intelligent data workflows that support real-time collaboration among diverse stakeholders—enhancing efficiency and outcomes throughout the entire project lifecycle. By ensuring the right people have access to the right information at the right moment, teams can make smarter, faster decisions—leading to better project transparency and overall performance. Many construction firms struggle with a host of challenges due to porr communication. Problems that will arise will likely make collaboration more challenging and undermine profit. How traditional construction companies usually conduct business Construction projects can develop in many ways. Some go smoothly and collaboratively, while others may be more turbulent and challenging. By closing the gaps between people, processes and technology, connected construction helps everyone identify and resolve problems faster. It’s about having up-to-minute information to make better decisions right from the start of a project for better outcomes at the end. Use data to improve team workflows Today’s contractors want to be free of managing multiple single-solution software programs that struggle to work well together. Instead, they’re investing in scalable platforms that enable them to take advantage of the latest tech innovations, including virtual and augmented reality, robotics, predictive analytics and machine control, drones, next-level pre-construction detailing and estimating tools, real-time financial, enterprise resource planning (ERP), project management capabilities, and mobile workflow and collaboration solutions. Better-managed projects and more streamlined processes – including the ability to process data in the field – can help firms achieve cost savings by reducing labor overheads and resource wastage, while also contributing to higher profit margins “One of our biggest business advantages is our ability to move information quickly, accurately, and efficiently to our people and equipment.” Britton Lawson, Director of Construction Technology, Veit & Company, Inc., United States The connected construction experience brings construction processes–from design and financing to engineering and maintenance–together to make your projects more efficient and profitable Exploring the connected construction experience If you have access to a common data environment (CDE) and a standardized set of connected workflows for all stakeholders, departments, and disciplines of the construction process, we can eliminate the challenges through better communication. But you might not be experiencing these benefits because you’re working in traditional business silos. This is why connected construction is so valuable. A single source of data that anyone can access at any time will improve communication, reduce labor overheads and resource wastage, and generate greater profit margins. How to make your move to connected construction When introducing new technologies as part of your connected approach, ensure you have a roadmap that outlines your vision and includes practical steps for how different teams will use the technology. A clear roadmap can help you convey your objectives and vision so that you can champion the benefits of the new technology. “Technology allows us to deliver a product that is not just built ‘as planned,’ but is delivered ‘as intended,’ often allowing us to make recommendations and deliver a final outcome that exceeds original expectations.” Jeff Buckley, Prefab/BIM Program Manager at Aldridge Electric, United States CASE STUDY Insider the Complex Construction of Seattle's New Aquarium
- Adaptive reuse - transforming an old building into a trendy Cacao mill
Bake bar cafe area in the Cacao processing facility. Refurbishing an old building for a new purpose is a sustainable way for architects and designers to create one-of-a-kind, inspiring spaces. The challenge is using your imagination. How can you look at an old building and visualize how it will function both aesthetically and functionally for its new tenants? STaND Design, an architecture design studio based in Mumbai, was tasked with reimagining an old fabric mill into an educational and visitor-focused cacao processing facility - The Cacao Mill by Subko . To share their ideas for the transformation, STaND used a combination of 3D modeling and immersive visualisation tools in SketchUp, including VR and AR, so that their client Subko Cacao could understand their plans to retain the original old mill structure Designing a 'Pod-to-Bar' experience On the wish list for the client was a viewing gallery, taking visitors through the journey of the cacao bean, from the meticulous selection of the finest cacao beans to taking the first bite of a chocolate bar. As a purpose-driven and quality-focused brand deeply invested in transforming the cacao industry in India, Subko Cacao wanted to include the full spectrum of the process in their new Cacao mill, which would be Mumbai's first chocolate factory. A 'Pod-to-Bar' experience was envisioned, and the team wanted to design a top-notch, beautiful aesthetic statement that would draw visitors to Colaba Causeway, one of the most exciting and eclectic shopping centers in Mumbai. To start visualizing and refining the mill's spatial layout, STaND took their ideas into SketchUp. Their process for modeling the existing space was thorough and multifaceted. First, they took manual measurements, conducted an extensive on-site survey, and took detailed documentation of all accessible areas, including floor plans, wall thicknesses, window and door placements, and any unique architectural features. They input the measurements into SketchUp to create a basic 3D model of the space, allowing them to visualize the overall structure and identify any areas that needed further investigation. Images of the work in progress show the ceiling and the arched windows. Due to the mill's 40-foot height, certain areas were difficult to measure directly. High-resolution photography was used to capture these hard-to-reach areas. Photogrammetry techniques were then used to estimate dimensions and details from these images, which they incorporated into the SketchUp model. When incorporating elements of the old fabric mill into the new design, STaND Design's philosophy was centered on preserving and showcasing the mill's industrial heritage. They implemented structural preservation — maintaining all existing structural elements, including the original roof truss system, which was cleaned and restored to highlight its craftsmanship, and the buttresses, which were reinforced where necessary while maintaining their original appearance. To showcase different periods of construction and repair, material exposure technique was utilised and layers of plaster and paint were removed to reveal the original limestone walls and clay bricks, which they cleaned and repainted using traditional methods. They left these materials exposed where possible, applying clear sealants to protect them while maintaining their raw aesthetic. Image showing the coffee and bake bar area. At the heart of the space, a central coffee and bake bar commands attention with its white marble countertops and a concrete front elegantly adorned with brass inlay. Surrounding it, metal seating with plush green cushions and wooden tables create a harmonious balance between raw industrial charm and inviting warmth. Restored industrial windows flood the space with natural light, enhancing its airy feel. The mezzanine, with its striking arched windows and skylights, adds a dramatic touch, casting soft, ever-changing patterns of light that heighten its allure. STaND Design strategically choose SketchUp as their office's go-to design tool because it empowers design creativity. They also leverage SketchUp's precision tools to add to existing conditions accurately. "We can swiftly translate visionary ideas into captivating 3D models. This agility in design exploration and iteration empowers us to consistently achieve superior outcomes across diverse projects." Siddhant Tikkoo, Principal Architect Siddhant added that "3D models were used to ensure that every aspect of the design, from the placement of machinery to the arrangement of customer seating, was functional and aesthetically pleasing from all angles. Iterating in SketchUp, the team designed a central atrium flooded with natural light." The ground floor of this space serves as a gallery of the factory, which includes the educational "bean-to-bar" chocolate-making process, a cafe on the mezzanine level, and essential kitchen and service areas tucked away discreetly from the public view. "SketchUp played a pivotal role in the design and planning of the Subko Cacao Mill. Its versatile capabilities and user-friendly interface significantly expedited the entire design process." Siddhant Tikkoo, Principal Architect STaND added thoughtful details to their model, such as an electric meter showcasing power consumption and graphics explaining the chocolate-making process. To add additional details, they also leveraged models from SketchUp’s 3D Warehouse . Communicating and collaborating STaND Design communicated their vision of the reimagined facility as they developed the plan with their client and project team. While the teams and stakeholders were spread across different geographical regions, they could access the files easily through the cloud-based platform Trimble Connect . This helped move the project forward and ensured the design process remained agile. “SketchUp's collaboration features allowed our team to work seamlessly together, even when members were geographically dispersed. This real-time collaboration facilitated effective communication and swift decision-making, crucial in a project with multiple stakeholders.” Nikita D'Silva, Principal Architect & Co-founder STaND Design credits SketchUp’s VR and AR integrations as game-changers during the design phase. The design team created immersive visualizations of the mill's layout for client presentations and internal reviews at key project milestones. These visuals helped fine-tune the design by offering a realistic preview of how the space would appear and function and allowed stakeholders to make informed design changes. SketchUp played a crucial role throughout the entire project lifecycle: Concept development — SketchUp was used to quickly iterate through design concepts, allowing the exploration of multiple options efficiently. Client presentations — The 3D models helped clients visualize the space, leading to more informed decisions and faster approvals. Stakeholder communication — SketchUp helped them create detailed visualizations for various stakeholders so contractors could better understand complex design elements and engineers could identify potential structural challenges. Problem-solving — When issues arose during construction, they quickly modeled solutions in SketchUp, saving time and reducing miscommunication. Detailed design — SketchUp was used to design custom elements like built-in furniture that complemented the industrial aesthetic, lighting fixtures that highlighted architectural features, and signage and wayfinding elements that integrated seamlessly with the space. Interoperability The software's ability to seamlessly integrate with other design tools and software used by STaND is a critical factor in enhancing workflow efficiency. This integration streamlines processes, enabling smooth import and export of models and effortless sharing of project data, ultimately enhancing productivity. SketchUp's adaptability is another benefit for STaND Design. Through extensions, they can tailor the software to their precise needs, enhancing both efficiency and versatility. This ensures that SketchUp harmoniously aligns with STaND Design’s unique approach and specific project requirements. While SketchUp was the primary tool, STaND Design integrated other software: Adobe Photoshop was used for texture creation and image editing, Adobe Illustrator was used for creating 2D graphics and diagrams, and Adobe InDesign was used for compiling presentation materials and reports. CAD software was used to create detailed 2D technical drawings required for permitting and construction. Enscape was used for creating photorealistic renderings and animations of the final design. “SketchUp provides educational resources , making it an invaluable tool for training and skill development within STaND. This ensures the team remains at the forefront of design trends and technologies.” Siddhant Tikkoo, Principal Architect “The vibrant SketchUp user community adds another layer of support and inspiration. Access to a wealth of resources, support forums, tutorials, and a marketplace for assets and extensions enables STaND to leverage collective expertise, troubleshoot challenges effectively, and maximize the potential of SketchUp.”-Siddhant Tikkoo, Principal Architect By embracing SketchUp as its primary design software, STaND has adopted a holistic solution that amplifies creativity, precision, collaboration, efficiency, and adaptability. With SketchUp, they are well-equipped to bring their design visions to life, elevate client experiences, and continually set new standards of excellence in the design industry. SketchUp has become an indispensable tool in STaND's mission of transforming creative ideas into remarkable realities. Photo of the completed project Tips from STaND Design for SketchUp users: We asked STaND Design what helped them efficiently bring their designs to life in SketchUp, and here were their top tips: Organize with groups and components: Use groups to logically divide your model (e.g., by floor, room, or system), and create components for repeated elements to ensure consistency and easy updates. Utilize layers: Set up a clear layer structure at the project's start and use layers to manage the visibility of different design options or construction phases. Leverage extensions: Bevel : Great for creating realistic edge details on architectural elements. BoolTools : Invaluable for complex modeling operations like merging or subtracting shapes. CleanUp³ : Helps maintain a tidy and efficient model by removing unused elements. Skimp : Useful for optimizing large models to improve performance. Develop a consistent naming convention: For files, groups, components, and layers, this becomes crucial when working with large teams or complex projects. Regular model audits: Periodically review and clean up your model to ensure efficiency. Check for and purge unused components, materials, and styles. About Subko Cacao Subko Cacao represents a purpose-driven, design-centric, experiential, and quality-focused brand deeply invested in transforming the cacao industry within the Indian subcontinent. They proudly identify as a 'Pod-to-Bar' experience brand, underscoring their comprehensive approach to cacao sourcing, processing, and production. This visionary brand has made it its mission to reshape the cacao landscape in the Indian subcontinent. Its unwavering commitment to purpose, design, quality, and the customer experience underpins its mission. The brand believes in stewarding the entire cacao journey, from nurturing cacao pods to crafting exquisite chocolate bars. About STaND Design Co-founded by young architects Siddhant Tikkoo and Nikita D’Silva in 2016, STaND is a studio where minimalism and exploration come together to create pure, warm spaces. Keen to help clients experience their spaces in unexpected ways, their designs are born from a desire to explore new techniques and materials. Always blending a multitude of design philosophies, they are constantly building their knowledge base to evoke emotion by bringing modern but sustainable spaces to life.
- Sync SketchUp and Layout and Improve Accuracy
Unlock the full potential of SketchUp’s LayOut tool and supercharge your documentation workflow. LayOut bridges the gap between design and communication—perfect for architects, interior designers, builders, and anyone who needs to present spatial ideas in a clear, structured format. What is LayOut? Whether you're creating detailed construction drawings, annotated floor plans, or professional presentation packages, LayOut makes it easy to place your SketchUp models onto pages, add dimensions, notes, and graphics, and export everything as PDFs or print-ready documents. Reduce Repetitive Tasks and Improve Accuracy With new and improved features like Auto-Text, dynamic labeling, and updated shortcuts, users can produce clear, data-rich documents that stay in sync with the design. In Architectural Drawings, you can: ● “Send to LayOut” from SketchUp or “Insert” in LayOut ● Change Viewport size ● Change or update Style ● Choose View ● Set Scale Add 2D Elements ● Add Hatches ● Add Dimensions ● Add Notes and Annotations Dynamic "Live" Updates A. Auto-Text With LayOut’s Auto-Text labeling , users can automatically pull in and display data directly from SketchUp components—saving time and reducing errors. This feature helps streamline documentation across different teams and ensures every member on the project access to the most updated informatiom whenever changes happen. B. Labeling Say goodbye to manual text updates and inconsistencies. Easily reference component details like Name, Price, Size, URL, Status, Owner, Type , and more. These attributes are dynamically linked, so when your model updates, your labels do too. No more chasing down mismatched details across multiple drawings. With smart labeling, your documentation stays consistent, accurate, and presentation ready. Smart Modeling Tips for Better Performance Purge Unused Items : Clear out unused components, materials, layers, and styles to reduce file size. Simplify Geometry : Reduce the number of segments in arcs and circles to lower polygon counts without sacrificing visual quality. Choose Lightweight 3D Warehouse Models : Opt for simplified components that won’t weigh down your file. Use 2D for Entourage Elements : Trees, furniture, people, and vehicles can often be represented effectively with 2D symbols rather than detailed 3D geometry. Save Complex Elements Separately : Store high-detail components in external .skp files and import them only when needed to keep the main model nimble. Organize with Tags and Scene Management Before sending your model to LayOut, structure it clearly with tags and scenes for smoother navigation and viewport control. Model Organisation Organize elements by building systems or categories. Here’s one example of effective tagging: EXTERIOR – Wall, Window, Door, Roof INTERIOR – Ceiling, Wall Finish, Floor Finish MEP – Mechanical, Electrical, Pipe, Fixtures, Furniture STRUCTURE – Footing, Column, Beam GUIDE – Grid, Level, Axis, Room Tip: Develop your own system that reflects your workflow. Model Organisation Tip: Tag elements clearly By tagging elements clearly, you can set up scenes in SketchUp that isolate specific parts of your model—making LayOut faster and more focused. Use Nested Models for Better Control For complex projects, nesting your model into logical parts provides greater flexibility and improves performance in LayOut. Example Nesting Strategy: Room Components → grouped into Floor Model → grouped into Interior Model / Exterior Model / Structure Model → linked into Master Model File This structure allows you to: Toggle visibility easily Load only relevant content into LayOut Keep pages lightweight and fast to update With nested models and clean tagging, LayOut loads only what’s needed—helping you work faster without compromising on detail or clarity. 2025 Highlights: What’s New in LayOut Intuitive Tools : Rotate, Copy, and Scale now behave just like in SketchUp—making it more intuitive and seamless to switch between the two. "Join Selected" : Combine multiple lines in one click—great for cleaning up imported drawings or simplifying geometry. Zoom Window Tool (Z) : 🔍 Zoom directly into a selected area for quicker navigation and precise editing. Support for Environments & PBR Materials : Visual fidelity from SketchUp is now better represented in LayOut documents. Flexible Print/Export Options : Print directly from the Page Inspector. You can choose to output individual pages or specific ranges, instead of the entire document. Read more about SketchUp Layout 2025 here
- Connecting traditional Japanese architecture with the next generation
Sotaro Yoshikawa, who grew up watching his father, a master carpenter, talks about how he used SketchUp in an unprecedented project to "realize a client's dream tower. He shares his passion for preserving temples that serve as a "source of spiritual comfort". A tower that was modelled based on a client's dream What made you enter the world of shrine and temple architecture? My father, Sukeyo Yoshikawa is a master carpenter for palace and shrines, and I grew up watching him and going to construction sites with him, learning carpentry little by little. I think it was a natural choice for me to become a palace and shrine carpenter. My father's achievements were widely praised, and I always heard about his fame. It was the thought that "my father's work is wonderful" that drew me into this world. To this day, my father is my greatest teacher. This work of preserving Japan's cultural structures as Japan's heritage is the gift of our ancestors' wisdom and skills. Although there are only a few drawings remaining, most have been passed down orally. I believe that my mission is to continue this tradition and pass it on to the next generation. Please tell us why you started using SketchUp and how has it helped your workflow? In temple and shrine construction projects, we are always faced with various problems such as deadlines and technical specifications. In particular, to improve technical specifications, we have invested in high-spec PCs costing 2 to 2.5 million yen. By introducing SketchUp, we have been able to scan large-scale point clouds and create 3D models very smoothly. The software allows us to create 3D objects as though we are sketching them. The most convenient and amazing aspect is how easy it enables users to manipulate models and create structures. It allows inspiration to flow easily. My favourite feature in SketchUp is Push/Pull. When I used it for the first time, I was shocked at how easy it was to model. Sotaro Yoshikawa, CEO of Yoshisho Architecture and Crafts SketchUp is currently used in almost all of our projects. Unless you are a very experienced user, no customer can get a sense of the actual image from just a drawing. On the other hand, 3D models created by SketchUp allow anyone to get a sense of the actual image at a glance. The bell tower (left) and scan data of Gosetsuji Temple (Fukui), the head temple of the Shinshu Izumoji school (image credit : T&I 3D Co., Ltd.) Can you give us some examples of projects where you have used SketchUp? I have used SketchUp in a variety of projects, including the renovation of the floats at Togo Shrine, Hachioji Shrine, Hachioji Minami-cho, Hachioji Yahata-cho, Ogose Hon-cho, and Ogose Kawara-cho, among others. One of the most memorable projects in my career was bringing a tower to life — not from blueprints, but from a client’s dreams. When the client sent me his hand-drawn sketch by fax, I knew this wasn’t just a typical design request. I visited the site and conducted a 3D scan of the environment. The point cloud data gave us an incredibly accurate foundation to work from, capturing every nuance of the surroundings. Using SketchUp , we translated the sketch into a fully realized 3D model, harmonizing the client’s vision with the physical context of the site. The combination of traditional inspiration and cutting-edge technology allowed us to bring the tower from paper to reality. I still remember the moment the structure began to take shape — the client was visibly moved. It was a powerful reminder that architecture isn’t just about building structures; it’s about honoring stories, dreams, and human connections. Sketch of a tower the client had seen in a dream One of the projects we will be working on in the future is to 3D scan the main hall of Myotsuji Temple, located in the mountains of Obama, surrounded by peaceful forests. The temple’s Hondo main hall and three-tiered pagoda are designated National Treasures in Fukui Prefecture. Fukui is easily accessible via the Shinkansen, and although it is the only national treasure, the number of visitors has been low, which was an issue. Since it is a wonderful building, we hope that this will be an opportunity for many people to visit. Myotsuji Temple. Fukui Prefecture Can you share more details about using SketchUp Point Clouds? Creating 3D models from point clouds helps us reach a consensus among various stakeholders. For example, the office staff can confirm the quantity of building materials, and the carpenters on-site can visualize the model for the customer. Since consensus can be reached among all stakeholders at every stage, the project can proceed smoothly from the start of construction to completion. What do you think is the most important aspect for your work? At first glance, the work we do as palace carpenters may seem to have been handed down traditionally without change, but I believe there are both things that can be changed and things that must not be changed, and that we must constantly make the judgment. For example, parts that previously were done by hand with a saw have now been replaced with electric circular saws, but this is something that is "okay to change" in terms of improving efficiency. On the other hand, I believe that the fact that "miyadaiku are at the cutting edge of all times" is something that "should not be changed." It is precisely because they have continued to pursue the cutting edge in every era that they have been able to leave behind such magnificent buildings. Our mission is to connect traditional Japanese architecture to the next generation. With fewer and fewer successors available these days, we want to convey the joy of traditional architecture to young people in particular. Hachioji Shrine (before restoration) Hachioji Shrine was imported into SketchUp as a point cloud and then drawn up in 2D using Layout. What advice would you give to the younger generation learning SketchUp? In order to get the younger generation to use SketchUp, I tell them to "try it out first." By actually touching these tools, you can experience the changes and have fun. I myself have always loved sketching, and the modeling process is what I enjoy most in my current job. I am so into SketchUp that I even use it to kill time on the train, and I am teaching my children how to use it too. They seem to be having a lot of fun using it, outputting modeled data on a 3D printer to create mysterious cubes. As mentioned above, I think it's interesting to be able to experience changes by "touching" it. Since its founding in 1975, Yoshisho Architecture and Crafts has consistently worked on shrine and temple architecture, which is the core of Japanese architecture. In 2023, the company's master carpenter, Sukeyo Yoshikawa was awarded the Agency for Cultural Affairs Commissioner's Award in recognition of his contributions to cultural heritage protection through the preservation and repair of national treasures and important cultural property buildings (mainly in the Kanto region), and training the next generation of architects.
- SketchUp + V-Ray 7: A match made in Studio
Need to produce high-quality visuals directly from your SketchUp models? SketchUp Studio users can access V-Ray directly to create photorealistic renderings, helping to eliminate design ambiguity and reach consensus more quickly. For MacOS users, no worries - you can purchase V-Ray 7 separately. • And with the new updates, V-Ray 7 delivers up to 3X Faster on MacBooks – New Metal support triples rendering performance when using both the GPU and CPU sides of Apple M4 processors, while doubling performance on M3 processors. For SketchUp Pro users, we can offer an option for you try out V-Ray 7 for free. Did you know V-Ray has been honored with an Academy Award and an Engineering Emmy. Used on hundreds of movies and shows, including hits like Iron Man 3, Spiderman- No Way Home, and TV series like Game of Thrones, Stranger Things and Star Trek: Discovery, V-Ray ensures a seamless blend of real and virtual elements on screen through the use of physically based rendering and adaptive ray tracing. Optimized to handle large production scenes, V-Ray is used to render digital environments, digidoubles, creatures, vehicles and more in a highly efficient way, helping it take hold at prestigious studios like Digital Domain, Zoic Studios, Scanline VFX, FuseFX, Mackevision and more. With a V-Ray subscription, you can access Chaos Cosmos, your built-in, render-ready content library featuring hundreds of high-quality 3D models: vegetation, furniture, lighting, accessories, people, etc. All assets are optimized for performance and render beautifully, whether you’re previewing in SketchUp, viewing in Vision, or producing final output with ray tracing. Best part? It’s searchable, always expanding, and included in your toolbar. Compatibility with Enscape Users can transfer real-time scenes from Enscape into V-Ray, including materials, 3D models, and lights, for a seamless end-to-end design process. By presenting your design story, you can showcase proposal merits to clients, and win more work. With SketchUp 2025, there is a significant speed boost in SketchUp Viewport. Additionally, there is a new Simplified Material Binding where the material viewport preview configuration is streamlined and made more intuitive. New for V-Ray 7 Gaussian Splats - Designers can now tap the power of Gaussian Splats for virtual tours and eye-catching effects — all in one place. You can quickly produce complex 3D environments from photos or video, using presets and other tools that reduce most processes down to a couple of clicks. With native support for Gaussian Splats, it is now possible to place buildings in context or render rich, detailed environments that can be reflected and accept shadows. Interactive Tours - Use Chaos Cloud, optimized for seamless CAD and 3D design workflow. Collect design reviews and keep everything on track via a single cloud-based platform for easy creative workflows. Users can now create advanced virtual tours, collaborative design reviews and smart rendering. It’s ideal for engaging your clients in immersive exploration of interior designs, landscape and urban architectural projects - from anywhere and on any device. These immersive panoramic experiences are highly customizable and you can add floorplans, contextual details, and design elements. In the V-Ray Framebuffer, go to tab "Collaboration". • Start using interactive virtual tours by creating a new project and upload all visual materials to communicate your design concepts. • Automatically generate hotspots in the Chaos Cloud Web UI. • Personalize the hotspots in your project and provide more information about any design detail, significantly enriching the user experience. Adjust the size of the hotspot and choose from a range of icon and color options. • Invite stakeholders to collaborate and share visuals or panoramas, projects and/or selected folders. • Manage user permissions by role and access type. Chaos Cloud Virtual Tours with Automated Hotspots | Now Available in V-Ray 7 Anyone can use Chaos Cloud virtual tours and design reviews You don’t need to be a Chaos customer to use Cloud virtual tours and collaborate during design reviews. Here is how anyone can join: • Open cloud.chaos.com or access it from the product page. • Create a Chaos account if this is the first time you are using Chaos products. Or if you are already a Chaos customer, login with your account. • Start using interactive virtual tours by creating a new project and upload all visual materials to communicate your design concepts. • Customize the user experience with floorplans, hotspots, and transitions. • Invite peers to collaborate and manage user permissions by role and access type. "My team uses renders for a client’s review. For people that aren’t used to CAD or 3D modeling, the rendering helps them visualize how a building will look when it’s complete, which is ideal for getting approvals or conveying design intent." Scott Miller, Architecture & Design director from The Remington Group Additional Features and Improvements V-Ray Frame Buffer Updates • Freeform Render Region – Designers can now re-render specific parts of their image with any shape they want. With limitless flexibility, users can render multiple regions at once, or hone in on a single area they want to fine-tune. • Color-Correction Presets – A new color-correction filters library can quickly boost the visual appearance of a render, providing users with quick access to many high-quality grading options. • Vignetting Layer – Vignette camera effects can now be added using quick shaping controls, helping users bring more attention to the center of an image. Artistic Aids • Layered Textures – A powerful new layering system will bring a Photoshop-esque experience to high-detail textures. Each texture layer can be stacked and tweaked with complete control over opacity, blending modes and more. • Gradient Texture Remapping – Advanced UV mapping capabilities now enable an advanced texture recoloring workflow. This is especially useful for procedural texture edits like pattern colorization, brick randomization and custom wallpaper designs. • V-Ray Luminaires – The ever-expanding Chaos Cosmos asset library, accessible through V-Ray, now brings a new light fixture optimization called Luminaires, which preserves the accurate light distribution while optimizing render times. Most of the light fixtures within Chaos Cosmos are now Luminaires in V-Ray 7. • Light Mix for Emissive Materials – Light Mix now lets designers adjust the intensity and color of specific emissive materials after rendering, for better lighting control and customizable renders. • Enhanced V-Ray Sun & Sky – For designers looking to create nautical twilight looks, V-Ray 7 offers an improved PRG sky model that can create more realistic images and immersive animations. V-Ray Sky can also now render various observer altitudes up to several kilometers. • Firefly Removal – V-Ray 7’s new algorithm automatically detects and finishes unresolved pixels, known as “fireflies,” during bucket rendering, greatly reducing the time needed to produce final images. Scatter Tools • Edge Trimming – Scattered elements now fit perfectly within set boundary lines, making it easier to populate any precisely defined area. • Camera Clipping – Users can now limit scattered instances to the current view of their camera. Chaos Cosmos Improvements • Non-Destructive Material Override – Users can now swap out Cosmos object materials without breaking the asset’s connection to Cosmos. • Asset Variants Support – Chaos Cosmos now has more asset variations to choose from, including seasonal options for 3D vegetation models (ex: summer or autumn leaves). Once users select their desired variant, they can just drag and drop it into their scene or even change the variant at a later stage. • 400 New Render-Ready Assets – V-Ray 7 incorporates the latest Chaos Cosmos update, which is packed with 250+ vegetation models, 70+ static people featuring both single and couple-based poses and new furniture from IWC Home and Fanuli. GPU Boosts • Faster “Time to First Pixel” – New optimizations for scatter rendering, texture heavy scenes, data uploads and geometry compilations offer a better interactive rendering experience and a faster time to first pixel for speed-conscious users. • Caustics Support – V-Ray GPU now supports caustics, enabling realistic surface reflections and refractions in both production and interactive rendering. The new Caustics solver is also optimized to fully utilize GPU hardware, delivering significantly faster results than a CPU. • RAM for Texture Memory – Textures are no longer processed by V-Ray GPU, giving users the ability to employ even bigger textures without worrying about memory constraints. How to access it Your SketchUp Studio subscription is Windows-only. You can use V-Ray 7 directly in SketchUp on your CPU or GPU, V-Ray Vision, and Chaos Cosmos. Simply download the V-Ray installer through your Account Management Portal under “My Products” and start using it. You also get access to Chaos Cloud, which allows you to render your 3D models straight in the cloud, freeing up your computer to do other work. That means you can get the power of V-Ray without expensive hardware: It’s all powered in the cloud. You can easily submit render jobs to Chaos Cloud directly from V-Ray for SketchUp's interface. It handles everything for you automatically - from licensing and uploading your scenes to launching virtual machines - so you get your job done fast. SketchUp Studio is a Windows-only offering and includes only a Windows installer for V-Ray. V-Ray is not currently available to Higher Education Studio Subscription holders. .
- Level Up: Landscape Architecture
Explores various levels of tree detailing in SketchUp, from 2D to high-poly 3D models, and understand rendering differences to optimize landscape architecture designs. Adding a forest to your SketchUp project can transform a flat landscape into a vibrant, lifelike scene. Whether you're designing an architectural visualization, a game environment, or a 3D animation, forests add depth and realism. Below is our recommendations of creating a realistic forest in SketchUp, from importing tree models to optimizing performance. Step 1: Setting Up Your SketchUp Project Before diving into tree placement, ensure your project is set up correctly: Open SketchUp and start a new project. Set the Units (Window > Model Info > Units) to match your scene’s scale (e.g., meters for large landscapes). Enable Shadows (View > Shadows) to see how light interacts with your trees. Step 2: Gathering Tree Models & Textures A realistic forest requires high-quality tree assets. Here’s where to find them: SketchUp 3D Warehouse (Free) – Search for "tree" and filter by "High-Quality Models." External Sources – Websites like Turbosquid , CGTrader , or SketchUpTexture offer paid and free models. Plugins for Vegetation – Extensions like Laubwerk , Skatter , or 3D Vegetation provide customizable trees. 🔹 Pro Tip: Use low-poly trees for large forests to keep your model lightweight. Step 3: Importing and Placing Trees Import Tree Models Go to File > Import and select your tree model (.skp, .dae, or .fbx). Ensure "Use as Component" is checked for easy duplication. Scatter Trees Naturally Avoid perfect alignment—nature is random! Use the Move (M) and Rotate (Q) tools to vary tree positions. Adjust scale ( S key ) for different tree sizes. Use Components for Efficiency Right-click a tree and select "Make Component." Duplicate ( Ctrl + Move ) to populate the forest efficiently. Step 4: Adding Ground Cover & Vegetation A forest isn’t just trees—undergrowth makes it believable. Add Bushes & Shrubs Import smaller plants and scatter them near trees. Use Skatter (a plugin) for automatic distribution. Apply Grass & Ground Textures Open the Materials Panel (Window > Materials). Import or select a grass texture and paint the ground. Adjust texture scale for realism. Step 5: Enhancing Realism with Textures & Shadows Adjust Tree Materials Some imported trees may need texture tweaks. Use the Paint Bucket (B) tool to modify bark and leaves. Enable Realistic Shadows Go to View > Shadows and adjust time/date for natural lighting. Soften shadows under trees for depth. Step 6: Optimizing Performance Large forests can slow down SketchUp. Keep your model smooth with these tips: ✅ Use Proxy Models – Replace high-poly trees with simplified versions while working. ✅ Hide Distant Trees – Use layers (Window > Layers) to toggle visibility. ✅ Purge Unused Assets – Go to Window > Model Info > Statistics > Purge Unused . Final Step: Rendering Your Forest (Optional) For professional presentations, export your scene with a renderer like: V-Ray (Photorealistic renders) Lumion (Real-time landscape rendering) Enscape (Fast architectural visualization) Conclusion Creating a forest in SketchUp involves smart asset placement, natural variation, and performance optimization. By following this guide, you can build lush, realistic forests that enhance your 3D projects. 🔹 Want More? Try experimenting with different tree species, seasonal colors, or animated wind effects for extra realism!
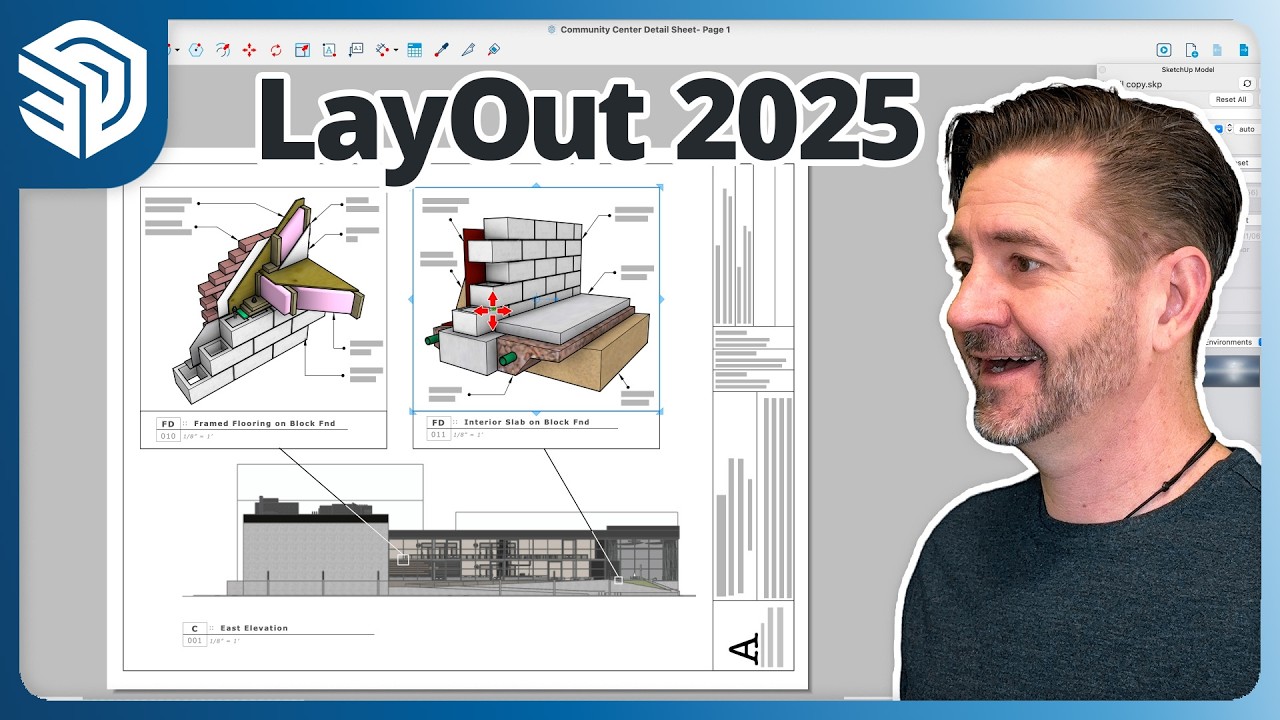
- LayOut 2025: Smarter, sharper and more seamless 2D Documentation
LayOut 2025 delivers a major step forward in usability, editing power, and visual fidelity—bringing 2D documentation even closer to the SketchUp modeling experience. Whether you're preparing construction drawings, design presentations, or annotated visuals, this release supports a faster, more intuitive workflow. Advanced Visualization LayOut now renders Photoreal Materials and Environments directly within SketchUp viewports, transforming how design intent is communicated on the page. New Ambient Occlusion settings add nuanced shadowing and lighting effects, dramatically enhancing the perception of depth and realism in 2D outputs. Key Highlights SketchUp-like Editing Tools: Move, Rotate, and Scale now behave just like they do in SketchUp, enabling a seamless transition between 3D modeling and 2D documentation. These tools are now standalone, inference-capable, and context-aware. Improved Shape Management: Refined Join and Split commands streamline the editing of vector geometry, making it easier to manage and manipulate complex drawings. Enhanced Visualisation Capabilities: Access new features—Photoreal Materials, AI-generated Textures, Environment Settings, and new 3D Warehouse libraries—directly in LayOut. These visual upgrades bring more stylistic variety and realism to your pages. Smarter Navigation & Viewing: Navigate documents more precisely with the Zoom Window (Z) and Zoom to Page (P) commands—new shortcuts designed for page-level clarity and efficiency. Streamlined Printing & Export: Faster, cleaner, and higher-resolution print and export options let users deliver polished documentation with ease. Live Model Linkage: Say goodbye to static exports. LayOut maintains live links to your SketchUp model, ensuring any changes in 3D instantly reflect across your documentation. Vector Drawing & Annotation Tools: Add technical details, dimensions, callouts, and line weights directly on your pages using LayOut’s robust 2D vector tools. Why It Matters LayOut 2025 blurs the lines between 2D and 3D work by making drafting more dynamic and integrated. The improved interoperability across SketchUp, LayOut, 3D Warehouse, and the SketchUp API/SDK makes it easier than ever to produce compelling, high-fidelity presentations with technical accuracy. Video Tutorial: Custom Scrapbooks in Layout Learn how to explore existing options, import SketchUp elements, and design scaled drawings for efficient reuse. Read more about how you can use Scan Essentials to reduce rework and cost overruns here . Learn more about Layout here .
- Create immersive retail experiences that keep customers coming back
For franchise operators and multi-location retailers, maintaining design consistency across stores is essential. With SketchUp, you can standardize layouts, materials, and design elements, creating templates that make it easy to replicate a signature look and feel — no matter the location. Setting up your model Before you start designing, it’s essential to set up your model properly. Start by selecting the right template, units, and scale tailored to your project. Don’t forget to bring in any relevant site information—like floor plans, photos, or measurements—to ground your design in accuracy. You can import existing floor plans into SketchUp. These provide a reliable reference for dimensions and layout. With SketchUp’s wide range of templates and import options, you can easily find the perfect setup for your specific retail design needs. Organize your model into layers and groups By using layers and groups effectively, you can simplify your workflow, avoid accidental edits and explore different variations for your design. Layers let you manage the visibility and editability of various elements in your model—like walls, floors, furniture, and lighting. Groups, on the other hand, help you isolate and adjust specific components, such as shelves, displays, or products. Applying materials and textures When it comes to creating environments that truly resonate, the right use of materials and textures makes all the difference. In SketchUp 2025 , photoreal materials help bring your vision. to live. With integrated Physically Based Rendering material support, you can enjoy real-time rendering, create outstanding visuals and make better material decisions - all in SketchUp. Seamlessly convert existing swatches to Photoreal Materials or explore a curated collection in 3D Warehouse. A beautifully designed store helps draw more customers in. Imagine walking into a retail space and feeling the warmth of rich oak flooring, the cool elegance of brushed steel fixtures, or the inviting softness of plush fabric seating. Use visual cues to attract more customers, and in your model, those cues come from the quality and realism of the materials you choose. Adding components and 3D Warehouse One of the most useful features of SketchUp is its ability to add pre-built (configurable) components to your project model quickly. SketchUp has a collection of components that you can access from the Components panel, or can access the 3D Warehouse , which is an online repository of millions of free components created by other SketchUp users. A new SketchUp Content Library is now available at 3D Warehouse where users can access collections of materials, environments, and more! Add doors and windows from SketchUp's extensive component library, or design custom components to fit the store’s unique specifications. Using extensions and plugins SketchUp’s extensions and plugins offer an incredible way to enhance functionality and streamline workflows. These additional tools help you push the boundaries of creativity and efficiency, adding specialized features tailored to retail design needs. With SketchUp’s Extension Warehouse , you have access to a vast online library of developer- and user-created plugins, from tools for creating intricate curves and shapes to generating dynamic patterns, visualizing lighting, and animating product displays. Whether you’re mapping out a flagship store or designing seasonal pop-ups, these extensions let you customize your design process with precision and flair. For instance, extensions like Curviloft simplify complex geometry, while V-Ray offers photorealistic rendering — perfect for presenting lifelike store concepts. Parametric modeling tools enable quick adjustments to fixtures and layouts, helping you explore variations without starting from scratch. Rendering and presenting your model SketchUp has a native renderer that you can use to make your design more realistic and attractive., or you can use external renderers that integrate with SketchUp, such as V-Ray, Enscape, Lumion, etc. Presenting your model helps you bring your vision in front of your clients, stakeholders, or audience, and there are different formats and methods, such as images, videos, animations, interactive views, etc. SketchUp has various options and tools for exporting and presenting your model, such as LayOut, Style Builder, Scenes, Animation, etc. When designing retail spaces, it’s not just about the fixtures and layouts — it’s about creating environments designed for human interaction . That’s where Chaos Anima ALL shines. It’s our go-to tool for populating 3D scenes with photorealistic human movement , adding a layer of realism and energy that makes your designs more immersive and convincing. With an extensive asset library featuring thousands of 3D people models and 4D humans in motion , Chaos Anima ALL helps you showcase how customers will navigate, interact, and experience your retail space. Whether it’s shoppers browsing shelves , staff assisting customers , or crowds moving through a flagship store , these dynamic elements bring your vision to life . The best part? We can offer you a trial account so you can try it out to add movement, scale, and storytelling to your retail design presentations. Reach out to us here via whatsapp if you are keen to try out SketchUp 2025. Or fill up our contact us page here .
- PreDesign for SketchUp
Sustainable architecture and energy efficiency design for buildings can be challenging because i n traditional workflows, environmental performance often enters the conversation too late—after the building model is complete and flexibility is limited. But sustainability shouldn't be an afterthought. PreDesign empowers architects to take climate responsiveness into account from the very first sketch. By integrating site-specific environmental analysis at the earliest stages of design, PreDesign helps you make informed decisions that shape not only your building—but its long-term impact on the planet. With PreDesign, you can get the valuable data you need to weave contextual insights into your project and get your creative juices flowing before you launch into 3D. PreDesign is great for Anyone designing a building, building renovation or outside space. Anyone looking for design inspiration or ideas when considering a new building design or renovation. With SketchUp’s PreDesign tool you can: Obtain information about the climate that will help you design a better building. Get inspiration and ideas for incorporating local climate factors and environmental considerations into your design narrative. Find out what design strategies will work well before you start building your 3D model. Generate content that helps you convince others of the merit of alternative design strategies. SketchUp's geo-location and terrain features can help match the planned design with the actual site of the project. Furthermore, you can enhance and expand your modeling capabilities by using extensions such as SketchUp Engineering Toolbox or SketchUp Energy Analysis . You can find and install these extensions by browsing the Extension Warehouse , downloading the files, and enabling the plugins. Where the PreDesign tool fits in: The SketchUp PreDesign tool is intended to be used as part of the “PreDesign” (also known as research) phase of a building or building renovation design project. The SketchUp PreDesign tool filters through design ideas and presents those that have the potential to be most suitable to your project, based on an analysis of historical climate data for your site. By using the SketchUp PreDesign tool BEFORE you start designing, you can avoid spending time thinking about strategies that are unlikely to be worth pursuing on your project. What the PreDesign tool does not do: It does not tell you how to apply design strategies to your project (although we do offer some guidance in the help section.) It does not guarantee compliance with energy or green building codes or standards. It will not be able to provide guidance for a specific 3D model you are working on (it only looks at building type and climate history and provides suggestions based on that). Choosing your location and climate data Specifying a location provides the following: a background map. This is used to help identify the project and as a background on some visualisations An easy way to helps us guide you to the right historical climate data for the study. In the create study workflow, you can start typing an address and you’ll start getting options that might relate to what you are typing. Consider climate in your design planning process. By optimizing a building’s orientation and selecting materials that enhance thermal mass and solar shading, you can significantly boost energy efficiency.
- Using SketchUp Data with Other Modeling Programs or Tools
In most industries and workflows these days, interoperability is key for efficiency and collaboration. We understand that people have different software preferences, and SketchUp isn't the only tool they use. Regardless of your toolset, the ability to move seamlessly between tools is critical, which is why we constantly look to improve import and export capabilities. When you want to use SketchUp with other modeling programs or tools, that typically means you need to either Import a file from another program into SketchUp. Export your SketchUp model into a file format that works with another program. A linked RVT file in SketchUp: With SketchUp Studio's Revit Importer, users can easily import and view Revit models to iterate and share from SketchUp quickly. Tip: When this article refers to other modeling programs or tools, that means programs outside the SketchUp family of software and tools. Learn the type of file formats that allows users to share 3D modeling data between applications. To import or export some of these files, you need a SketchUp Pro license or active SketchUp for Websubscription. The following table has a full list of the different types of files you can import into and export from SketchUp. Note: The SketchUp Subscriptions have additional import and export options as well. File Type File Extension(s) Subscription Type Learn More CAD files .dwg, .dxf Go Pro Studio Importing and Exporting CAD Files and Starting with a CAD File in SketchUp Image files .jpg, .png, .tif, .bmp, .psd, .tga, .eps Free Go Pro Studio Importing and Exporting Image Files PDF files .pdf Go (iPad only) Pro Importing and Exporting Image Files COLLADA files .dae Free Go Pro Studio Importing and Exporting COLLADA Files 3D Studio (3DS) files .3ds Go Pro Studio Importing and Exporting 3DS Files Digital elevation models (DEM files) .dem, .ddf Free Go Pro Studio Importing DEM Files for Terrain FBX files .fbx Go Pro Studio Exporting FBX Files Google Earth files .kmz Free Go Pro Studio Exporting KMZ Files for Google Earth OBJ files .obj Go Pro Studio Exporting OBJ Files VRML files .wrl Go Pro Studio Exporting VRML Files XSI files .xsi Go Pro Studio Exporting XSI files IFC files .ifc Pro Studio Exporting IFC files USDZ files .usdz Pro Studio n/a gITF .gib Pro Studio n/a
- SketchUp Extensions Warehouse - We love it!
SketchUp Extension Warehouse is a library of plugins, tools, and extensions designed to elevate the functionality of SketchUp. These valuable extensions can be downloaded and installed directly within the SketchUp software, making it easy to add new features and capabilities to your designs. Whether you're a novice or an experienced user, the Extension Warehouse serves as an invaluable resource, granting access to a diverse array of tools aimed at enhancing efficiency and productivity, ultimately saving you valuable time.
- Scan-to-Design with SketchUp
Scan-to-Design uses LiDAR scanning in SketchUp for iPad to generate 3D models of existing spaces using the following 3D outputs: Canvas generates a textured 3D model where surfaces such as walls, ceilings, or floors are drawn in SketchUp as planes and/or triangulated meshes. This output can then be edited using SketchUp’s modeling tools. The rest of the scanned space such as furnishings or decorations will be drawn as a textured, triangulated mesh. Apple’s RoomPlan technology generates a simplified model of the scanned space using orthogonal SketchUp edges and faces. Room features like windows and doors are represented as cut-outs. To use the RoomPlan output, you will need to toggle it on in the Tags panel. You can also set it as your preferred output in Scan-to-Design settings, turning the Canvas output off altogether. Canvas is the active visible output by default, but you can freely switch between both outputs in the Tags panel. Note : Scan-to-Design is a SketchUp Labs feature. Labs features are still in active development and may change or be removed at any time. For more information see SketchUp Labs . Using Scan-to-Design Tip : Start with a new SketchUp model for best results. The Scan tool appears in the Expanded Toolset. To scan a room: Activate the Scan tool. A scanning grid will appear on your iPad’s screen. SketchUp will offer prompts to help you capture a complete scan. Begin your scan by slowly panning your device up, down, and across the walls around the space. Continue in a steady, patterned motion to make sure you capture every possible detail. While scanning, you can tap Cancel in the lower left corner of the screen at any time to exit the Scan tool. When finished scanning a space, tap Done. Processing can take a few minutes. Review and start modeling using your scanned 3D output. Manage the visibility of your scanned output in the Tags panel. After scanning a space, SketchUp organizes the output imported into your model in the Outliner. For more information on how you can use the Outliner to organize, view, and manage groups and components in your model, see Outliner Panel Scan-to-Design Settings The Scan-to-Design section In Settings provides options to configure your scan output in a way that best represents your design workflow. Canvas Settings contains the following Canvas-specific options: Create a Mesh – When this toggle is on, Canvas will create a mesh representing the scanned output. If toggled off, the Mesh Level of Detail and Apply Textures to Mesh options will be unavailable. Mesh Level of Detail – Choose a level of detail between 2” and 12”. Apply Textures to Mesh – When this toggle is on, Canvas will apply textures to the mesh it creates. Create Simplified Planes of Room Surfaces – When this toggle is on, Canvas turns scanned room surfaces such as floors, walls, and ceilings into simplified planes. Apply Textures to Planes – This is only available if Create Simplified Planes of Room Surfaces is toggled on. Canvas will apply textures to simplified plane surfaces. RoomPlan Settings contains the following RoomPlan-specific options: Generate RoomPlan Output – Toggle this on to use Apple’s RoomPlan. If toggled off, all other options in this section will be unavailable. Include All the ‘Stuff’ that Fills a Room – Choose to include all objects in the room in your scan. Align Furniture to Room – RoomPlan will align all the objects recognized as furniture with walls. Single Wall Group – SketchUp will create a Group out of the scanned walls An additional setting appears near the bottom called Backside Color of Faces . This setting allows you to adjust the color that appears on the backside of the faces created by your output. Tapping the square opens a color picker dialog, allowing you to change the color as needed.